Original Post: http://forum.xda-developers.com/showthread.php?t=2500078&page=58
I had been waiting for a stable Android for T100 for a long time. And finally, there is a stable Android which is released by domini99 on XDA.
Now, based on the domini99’s installation tutorial, I add some images in each step for the beginners.
- Download the Android-x86 for T100 from this link (https://drive.google.com/file/d/0B8jVq7lqQUtvUkFyT0RhR2lJT28/view)
(The image is highly compressed again to save space, I would recommend using 7zip to unzip the image) - The zip contains an .apk file, place it on your SD-Card or USB Drive.

- Go to “Start Menu”, type “partition” and click on “Create and format hard disk partitions”.

- Now click on your main partition (C:), and select “Shrink Volume”.

- Now set the amount of space to shrink to what you want. (Minimum is 1500. Louis suggested at least 4000MB for installing games and many apps)

- Format as FAT32 and call it anything you like. I called my partition Android.

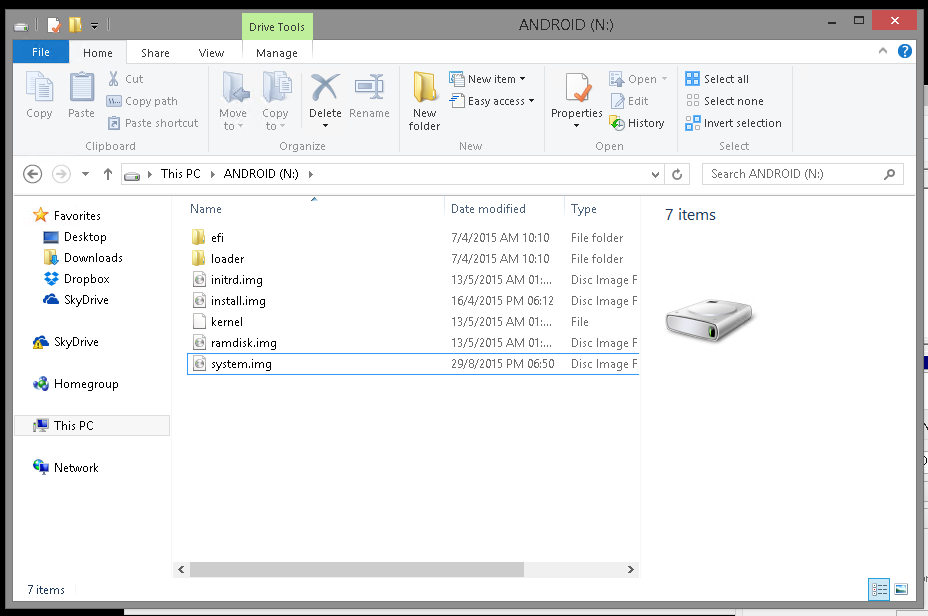
- Install Android OS: What you do, is extract the .7z file you downloaded to the partition you just created, minus the .apk file.

- Create a data.img
Download toporesize: http://forum.xda-developers.com/showthread.php?t=824154After you have done this, extract toporesize anywhere and run the toporesize .bat file.Select Create New, navigate to your Android partition and type “data.img” in the File Name box. (without quotations)
Drag the slider to the the size of the size you want the image to be.
The data.img acts as your virtual DATA partition
- The data.img should be created like this:
- Make Android bootable
Download EasyUefi: http://www.easyuefi.com/After you have installed EasyUEFI open it.
Click on “add boot” (the icon that looks like a calculator with a + sign)In “Type” change it to Linux.Select the Android partitionNow click “Browse” (may appear as Brower due to a typo)
Navigate to \efi\boot and select gummiboot32.efi
Give your boot a name in the “Description” box. Call it Android or something
Hit OK
and hit OK again.You should now see your Android boot option added to the list.
Step 5: Configure android and get logged in with your Google account
Now in order to boot android, shut down windows and wait for a couple of seconds until your tablet has turned off,
Now press the power and the volume down key at the same time, and once the tablet has turned on release the power button but keep pressing down the volume down key.
You should now see a menu that says “Please select boot device:”Keep pressing volume down until you have selected android, and hit the “start” key. (the key under the volume keys)
Wait for Android to boot.
After Android has booted, connect to a wifi network.
It might take a long time for the setup to get ready, please just wait. This is normal!
Skip all login steps, do not login with your google account!After this is done you should be at your home screen.
Now open Root Explorer, its is included into the image.
Go to the folder storage, and go to USB3
It will ask you to confirm root permission.After this, you should see your .apk file.
If you do not see the .apk file, try another folders like USB2, or USB1.
Install the .apk file, and accept verification.
DO NOT OPEN GOOGLE PLAY SERVICES AFTER THE INSTALLATION IS DONE!!!! VERY IMPORTANT!! JUST CLICK DONE!!!After the installation of the modified google services APK is complete, go to settings, scroll down and select “add account”
Log in with your Google account. You might see a lot of force closes, just ignore them.
It could take multiple tries to log in, but it should eventually work.
After login is done, the screen might glitch a bit and throw you back to the settings screen.
This is normal. Close any force closes that might pop up, just ignore them.
They will go away by themselves after all this is done.After this is done, Google Play store should work and your tablet is operational!


